
EP 13: End to End Automation using Selenium & Cucumber
Read time : 3 Mins

In today’s newsletter we are going to discuss
Introduction
Steps to write automation tests using Cucumber
Execute tests using Jenkins CI/CD
GitHub Repo
Introduction
Cucumber is a testing approach/tool that supports Behavior Driven Development (BDD). It provides a way to write tests that anybody can understand, regardless of their technical knowledge.
It explains the behavior of the application in a simple English text using Gherkin language.
Steps by step approach to write automation tests using Cucumber
Prerequisite
In this newsletter, we will be using:
Java as the programming language
TestNG as the assertion framework
Maven as the build automation tool
Selenium WebDriver as the browser automation tool
Cucumber as BDD tool
Eclipse as the IDE
Step 1: Add Cucumber Dependency in Pom.xml
Cucumber doesn’t actually interact with the browser and performs actions on the website under test. Interacting with the website is the action that is performed by Selenium WebDriver. Due to this reason, you will need to add Cucumber as well as Selenium dependency in Pom.xml
Add “cucmber-java” and “cucumber-testng” dependency in the pom.xml.

Step 2: Install Cucumber Plugin from Eclipse Marketplace
The next step is to install Cucumber on your Eclipse. For that, you need to go to Help -> Eclipse Marketplace -> Search Cucumber and install Cucumber on your eclipse. Below snapshot depicts the same.

Step 3: Create a feature file and add scenarios
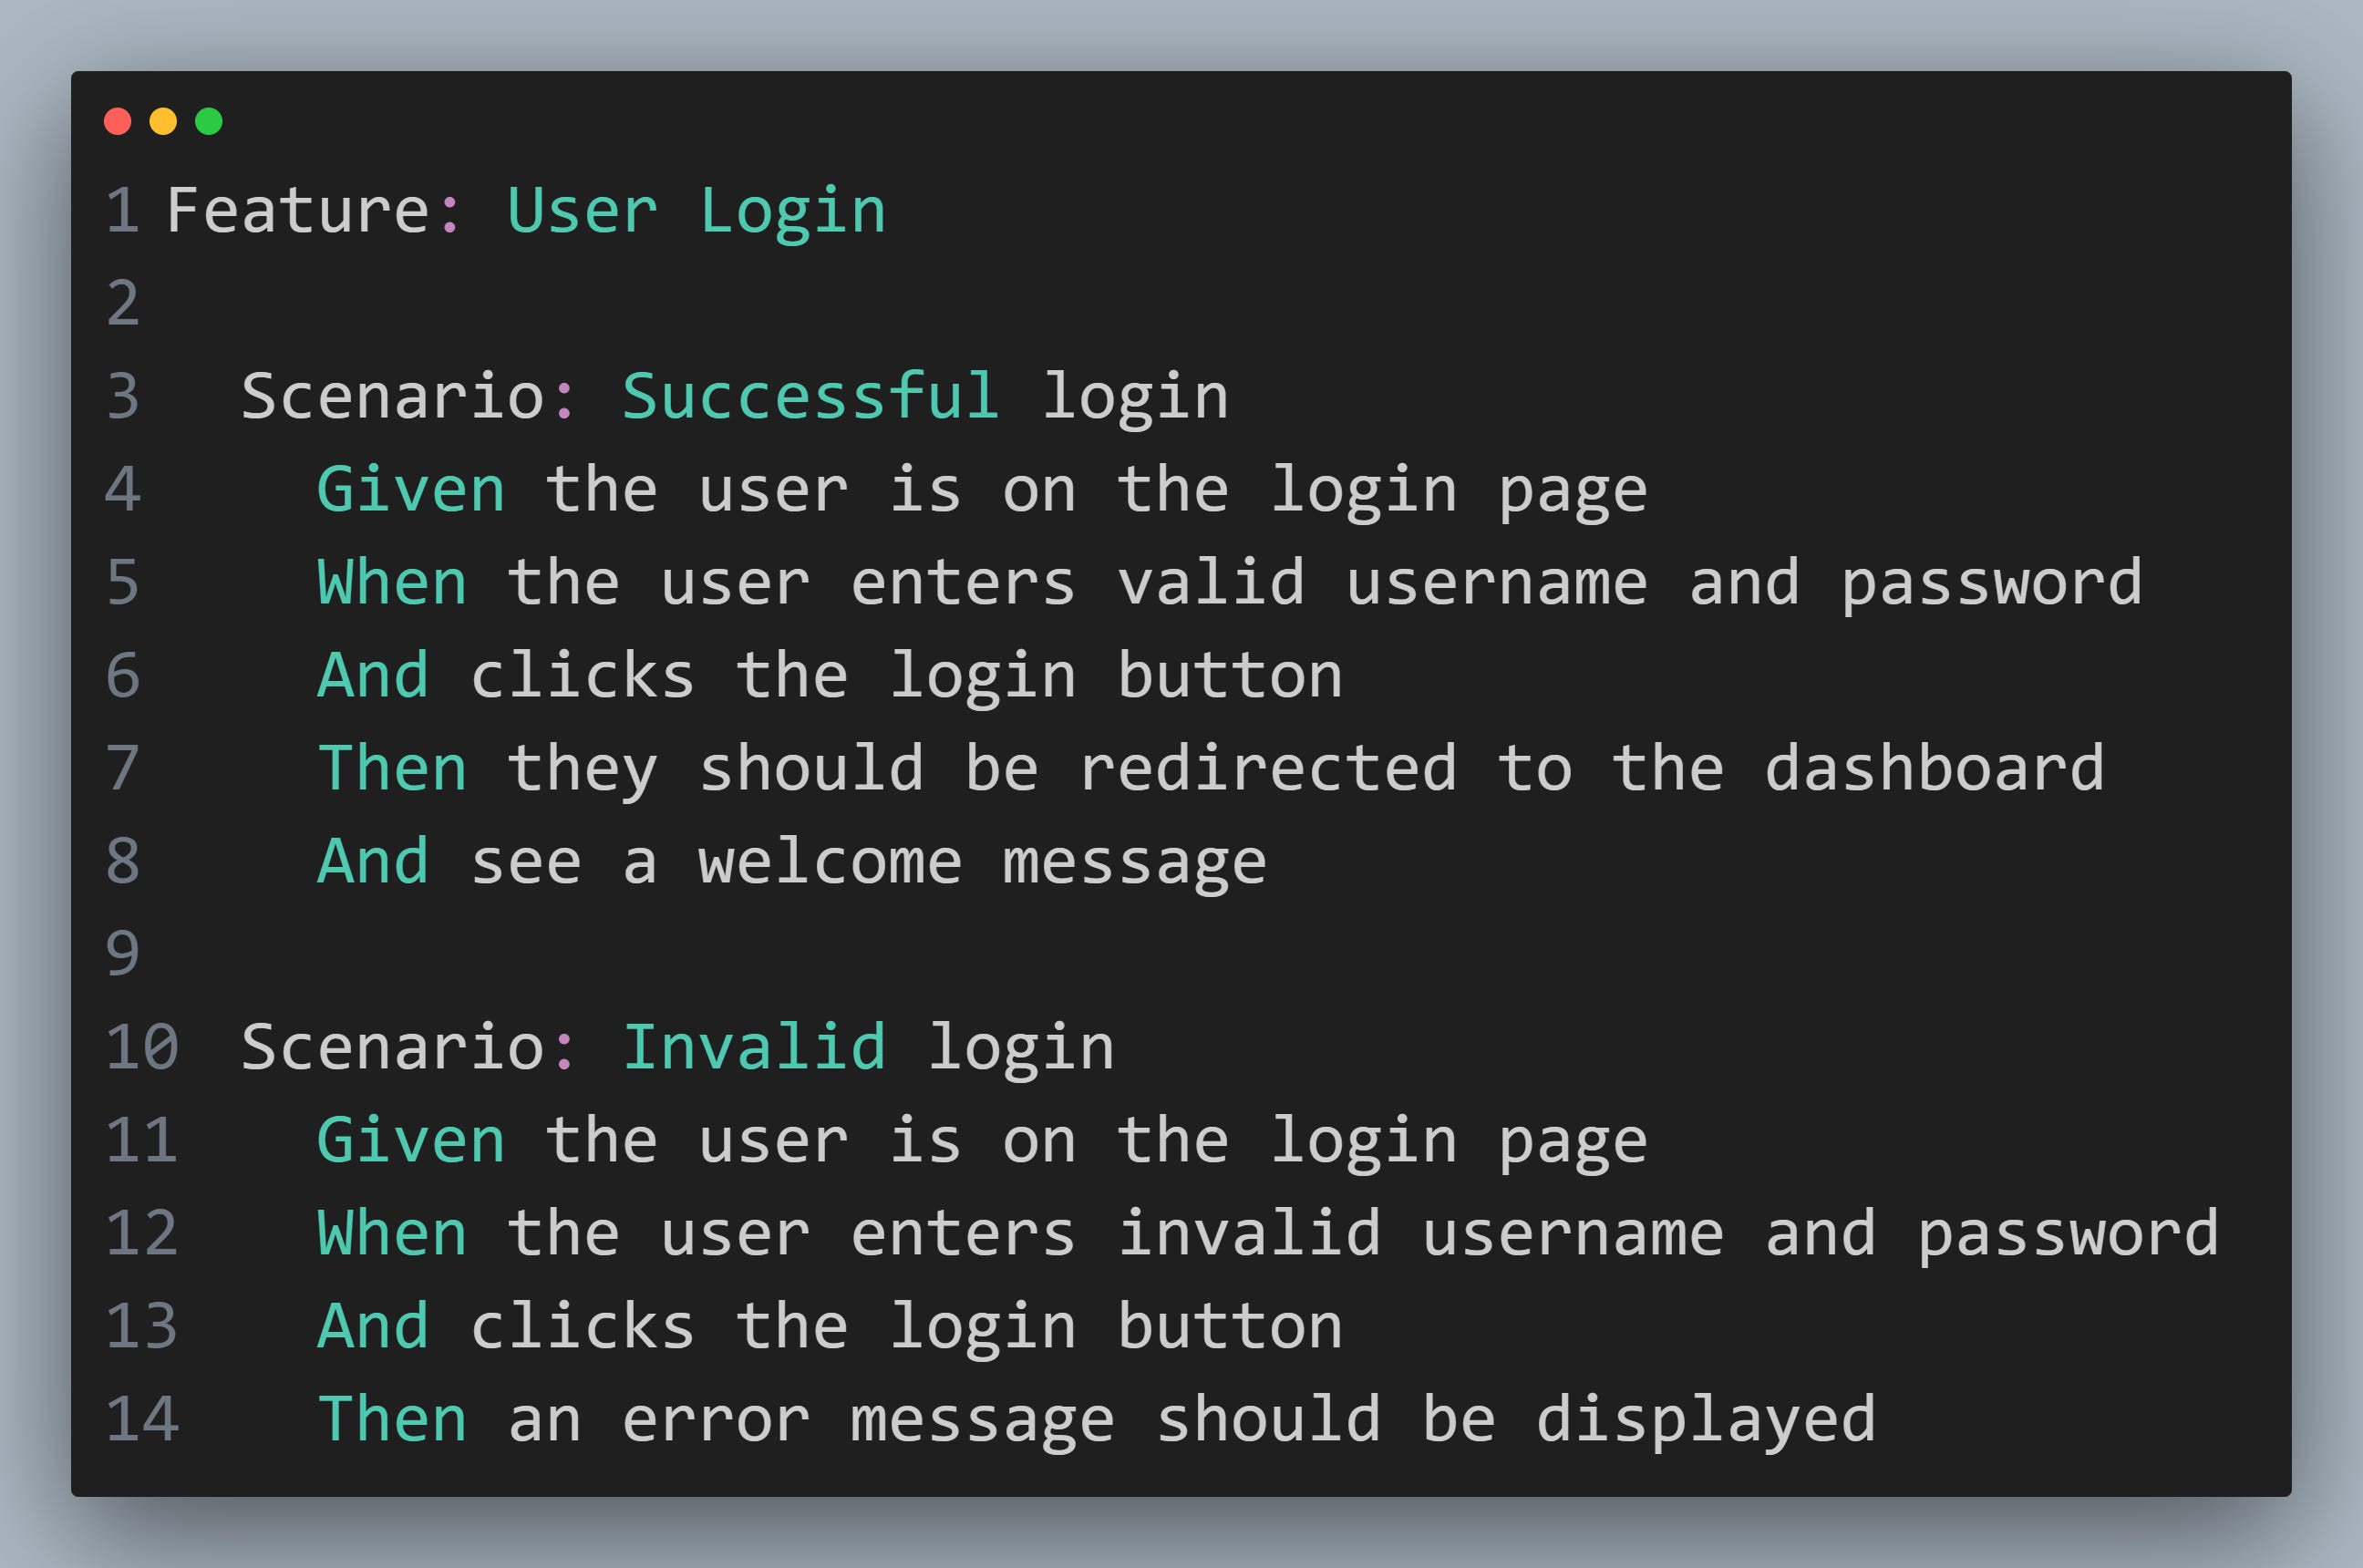
Once cucumber is configured, next step is to setup feature file. Create feature file as shown below.

Once Feature file is created, we can write scenarios as shown below.
Step 4: Implement the scenario using step definitions file
Step definition files contain the actual code implementation of the steps mentioned in the feature files. They map Gherkin steps to executable code. Each step in the feature file should have a corresponding step definition method.

Step 5: Write runner class and execute the class
TestNG will execute Cucumber scenarios based on the specified options in the @CucumberOptions annotation in your runner class. Here glue represents the step definitions file path.

Once we execute test runner file, here is the output we get.

Execute Tests using Jenkins
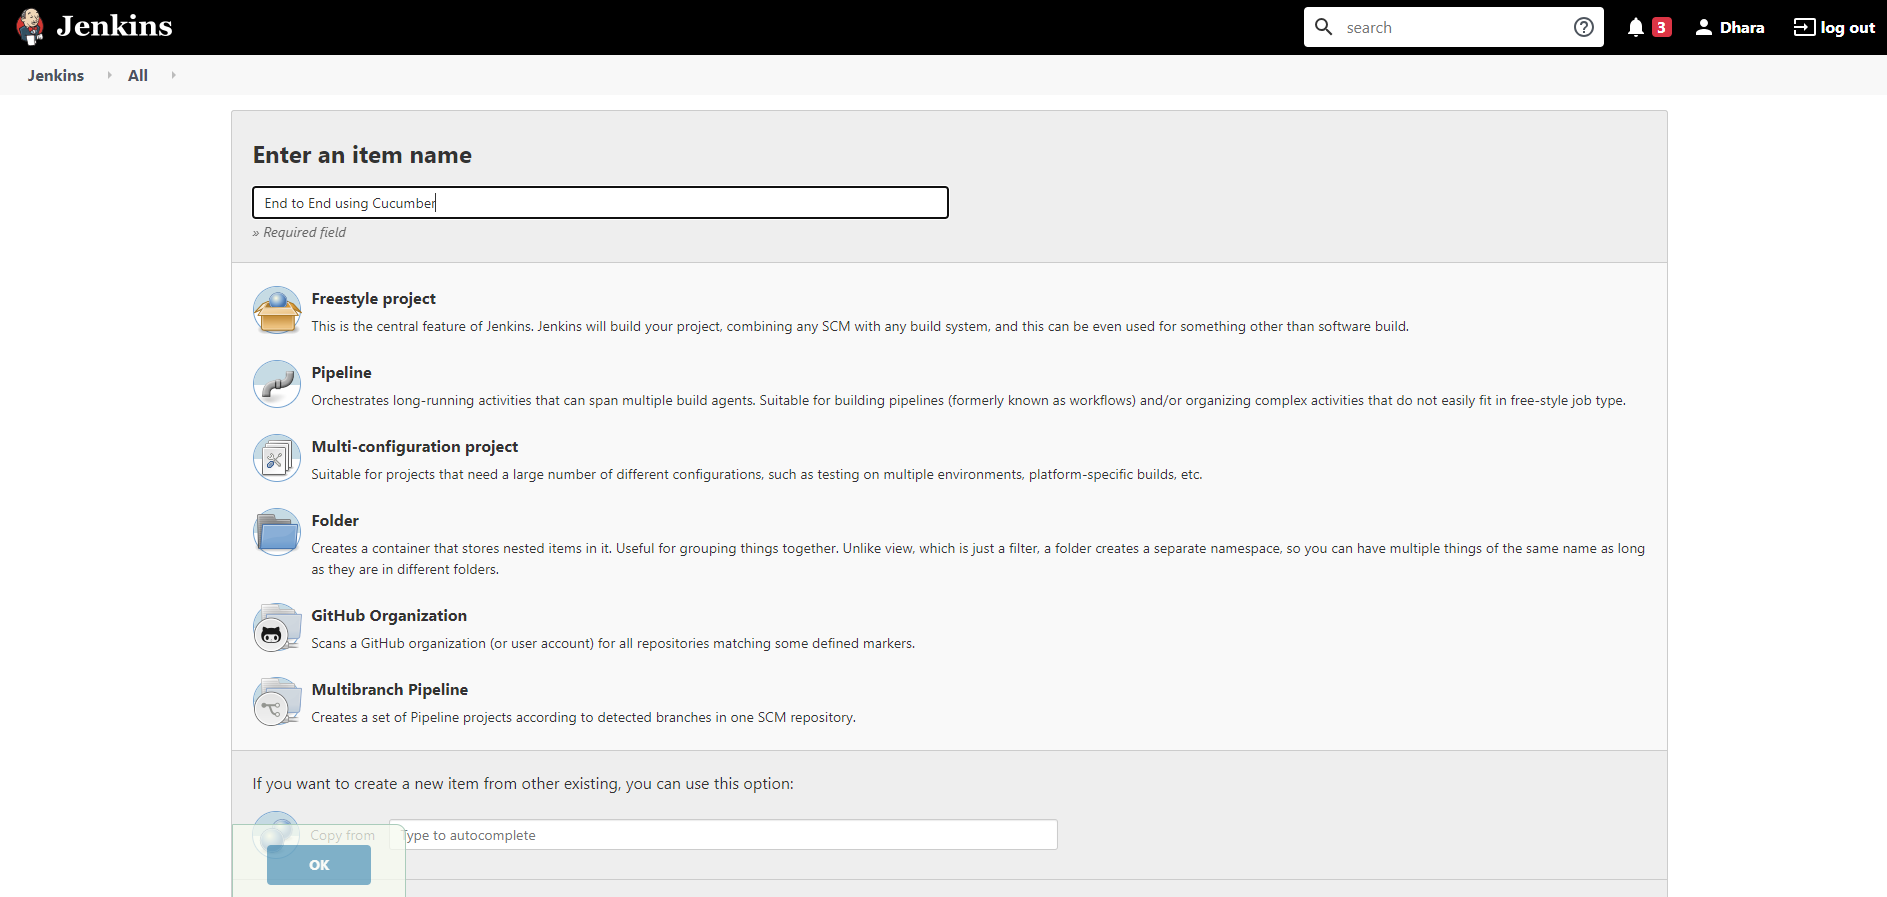
Step 1: To execute Tests using Jenkins, need to create new Item here in Jenkins. Here I have selected Free Style Project as shown below.
Step 2: Configure the Project created in Jenkins and add repository. Here I have added custom repository as shown below. Also add the maven command “mvn test” in the build section.

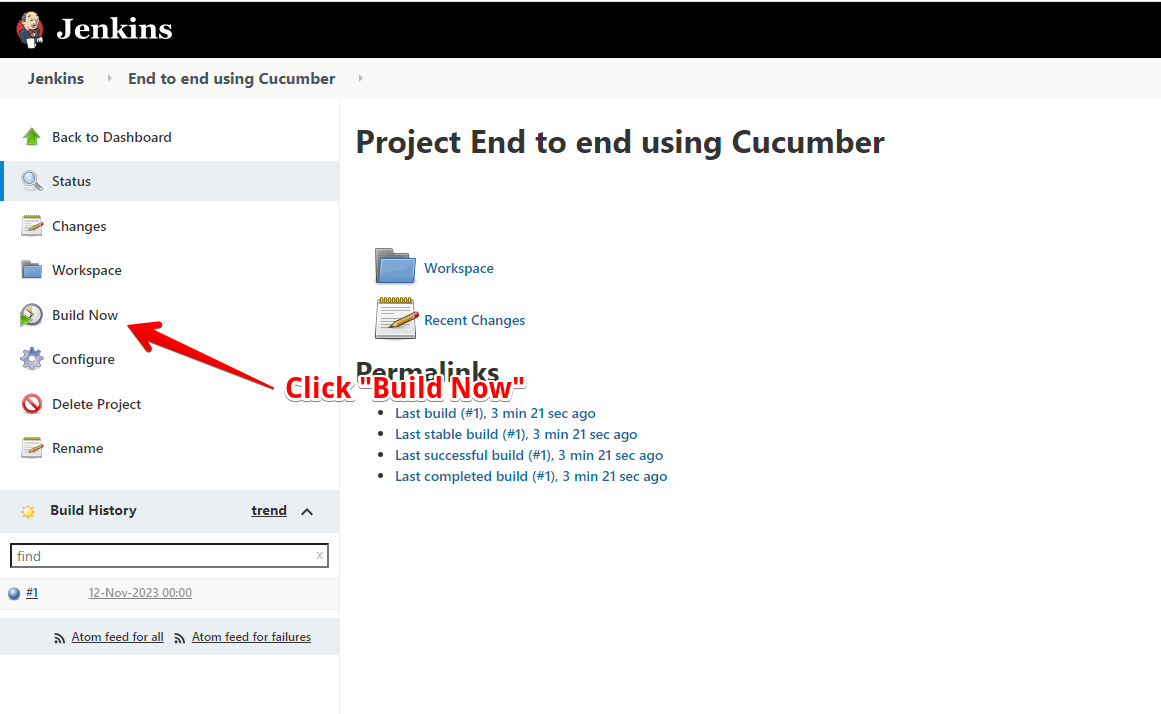
Step 3: Once project is configured, click “Build Now”.
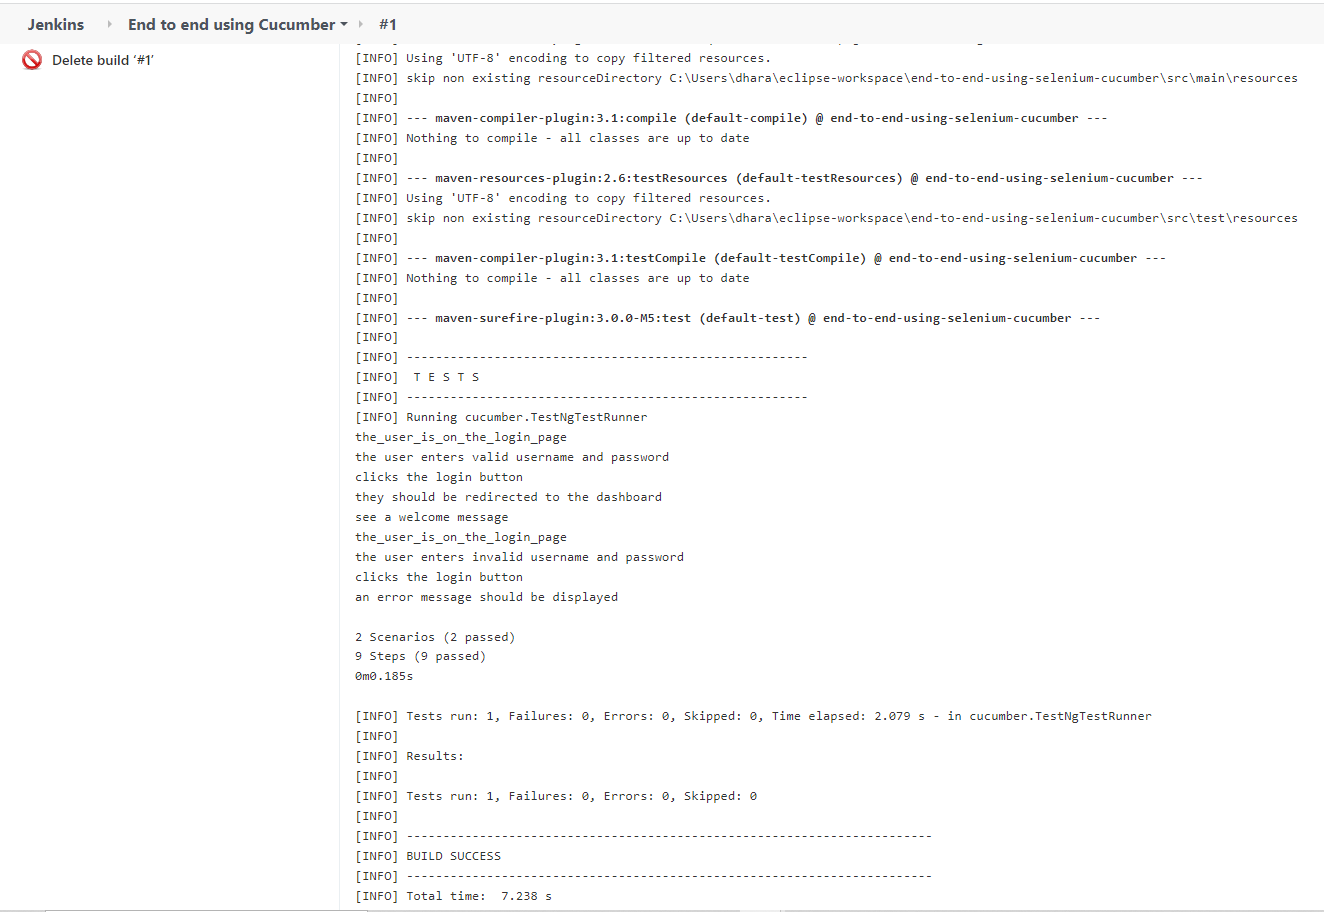
Step 4: Once build is finished, we can see test results in Console Output.
You can learn more about how to execute tests using Jenkins in details here.

GitHub Repository
You can find code of this newsletter issue at this GitHub Repository
“The difference between try and triumph is just a little umph!” – Marvin Phillip”
Let’s Connect on Social Media
Connect with me on LinkedIn (9K+ Followers) and Twitter.